DIY Christmas Decorations 2- Blogmas No.16- 2017
I don't know about you, but I do know that I love to do a bit of DIY! That's why I have already uploaded a post this Blogmas called DIY Christmas Decorations 1 (Of which I have put a link at the bottom of the page!) and so, here is the second in the series! Enjoy!
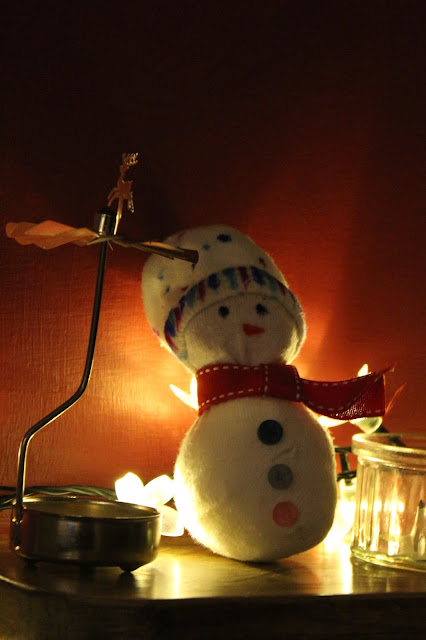
Sock Snowmen!☃
These cute snowmen are perfect to make with small children!
- A white ankle sock
- Three small buttons
- A piece of scrap fabric
- Rice/pillow stuffing (not the edible stuffing😀)
- Permanent Marker in the following colours: Black, orange and three more of your choice!
- Superglue (Mind those fingers!✋)
- Scissors
- Elastic Bands x2
1. Cut the sock in half where the heel should go and put the top half to the side. Stuff the remaining part of the sock with rice or pillow stuffing!
 2. Once you have stuffed it, you will need to secure the opening of the sock shut with an elastic band. To create the two separate snowballs, apply another elastic band to the middle and shape it to how you want it.
3. Draw a face onto the snowman with a black permanent marker for its eyes and an orange one for its carrot nose. I chose not to do a mouth on mine because it looked quite cute without one!
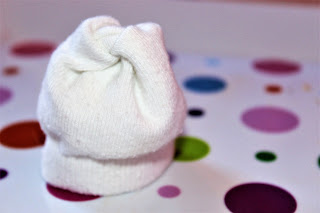
4. For the hat, lay it flat on the table and cut a slit down through the middle of the sock but not all the way to the bottom. Turn it and lay it back down so that the slits are on the sides of the sock. Snip another cut into the sock, once again, down the middle. When you pick it up it should look something like this:

5. Move the sock so that it's inside out and tie each tassle that you just made to its diagonal opposite. If you then make the sock the correct way round again it will look like a little hat! You can then decorate this as you wish with the other permanent markers.
6. Use the superglue to glue on the buttons to the snowman before finally cutting a piece of scrap fabric to secure around the snowman's neck for a scarf.
Twine Stars!⭐
Beautiful for hanging on the stairs😉!
- Twine
- Cardboard
- Sticky tape
- Scissors
- Glue gun (optional)
1. Start by cutting out some cardboard in the shape of a star.
2. Secure an end piece of string to the star near a corner with some sticky tape and wind the string around the top of the star's point and slowly bring it down, attaching it with some glue from the glue gun every so often to keep it firmly in place. This is the way I would recommend to do it but if you don't have a glue gun- like me- tape the back to keep everything in place- this way is very likely to fall apart fast.
3. Do this to each prong (is this the right word?😕) without cutting the twine. You can do this by securing it in relevant places so that it's in the right place to start.
4. When you've done this, wind the string (still don't cut it) from various corners to other corners so that the middle becomes covered and the cardboard is no longer visible.
Ribbon Christmas Trees!😆
Great for decorating your home!
- Super Glue
- Ribbon Scraps
- Clean Twigs
1. Cut the ribbon scraps into a Christmas tree shape and display them this way.
2. One by one, attach them to the twig in the middle with superglue.
3. You can add a loop of thread to the top with superglue so that you can hang it on your Christmas tree or on a wall!
________________________________________________
I really hope that you enjoyed reading this post. If you did, please show your appreciation by clicking that 'Follow' button! Also, if you have made something from this post or have been inspired, let me know in the comments and tell me what you've made. Maybe even share some of your ideas.⛇
Stay tuned for more,
Elly 😊


Can you give us some more ideas?
ReplyDeleteI have made another post with more ideas: Felt Decorations. Hopefully, it should help you! Here is the link to this:
Deletehttps://ellycuriouswords.blogspot.co.uk/2017/12/felt-decorations-blogmas-no-20-2017.html